Showing posts with label DIY. Show all posts

Thursday, March 12, 2015

DIY Pompom Bag


Up here in Scotland, summer currently feels like an abstract concept.......something that belongs to warm and faraway places whilst we continue to wear our rainproofs, winter woollies, and soldier through wind and rain. In order to cheer myself up, I decided to do a spot of really simple but happy DIY. Meet my new pompom bag!


I first spotted this Moroccan straw basket at the Stockbridge market many weeks ago. They came in both plain and pompomed varieties. The latter was clearly more fun but the colours did not talk to me. Also, the pompomed bags were nearly twice the price of the plainer ones. At a similar time, the nice folk at Deckchairstripes sent me some crafty bits and bobs, although it took me all those many weeks to figure out exactly what I wanted to do with them....a DIY pompom bag of course!


Like all my DIYs, this one is also very very simple...stick, sew and play! You will need:
-pompoms
-fabric glue
-needle and thread for sewing
-a pair of scissors

Arrange the pompoms in a pattern of your choice and then stick them in place with fabric glue. Once dry, sew the pompoms firmly in place using a needle and thread. And voila!


Have you been up to any DIY tricks recently? Ann x

To get in touch and see the latest on all my adventures, follow me on BloglovinTwitter,Instagram or Facebook.

Sunday, January 18, 2015

DIY Embellished Jumper


For me, 2014 was a year of streamlining life. Moving house twice might have influenced that a little bit. Over the last year, I've been analysing the clothes I have got the most wear out of (whilst making me feel good). As I've literally lived in my Isabel Marant and Etre Cecile sweatshirts all through Autumn, I figured adding another good statement version would be a sound idea. I've lusted after a Markus Lupfer embellished version for a long time but instead of shelling over a £150 on one, I decided to make an embellished version of my own design for a fraction of the price.


To create your own embellished version, you will need:
-A good quality plain sweatshirt. I bought my navy one from Gap for £9 and it's great.
-Fabric glue
-Embellishments:  sequins, diamante or stick-on designs. I found mine in a tiny little haberdashery in Mangalore
-Outline design
-Sewing pins


Method:
-Arrange your design on the sweatshirt. Sewing pins are useful to accomplish this. 
-Lay the sweatshirt flat and map out your design on it
-When you are happy with the arrangement, you fabric glue to stick the embellishment on to your sweatshirt.
-Press and hold each adhesion for about ten seconds to allow it to set.
-Leave it to dry for 24 hours


Your embellished sweatshirt is now ready to wear! Fancy giving it a go? Ann x

To get in touch and see the latest on all my adventures, follow me on BloglovinTwitter,Instagram or Facebook.

Tuesday, September 30, 2014

The Quick & Easy Way to Make Glass Sparkle


It's been a while since I've done a DIY post and this isn't exactly making up for it. However, it is a super quick, easy and effective DIY to make all your glassy possessions sparkle. Cleaning our lovely wine glass chandelier can be a challenge as it tends to get dusty and at times a little grimy depending on its kitchen location ( it's been in three different homes with us now). I've tried used regular cleaners but they either made the glass cloudy or left it streaky.

I eventually decided to give distilled white vinegar a go and it proved to be a marvelous cleaner. All you have to do is mix equal measures of vinegar and warm water in a washing up bowl and gently rinse the glass. Drain and dry as you would your regular dishes. The difference is remarkable. I've also noticed that the glass tends to stay cleaner for longer after a vinegary wash.

You can also make a spray of the vinegar-water mixture and use as a very effective window cleaner! I've also used it to clean the windows of our old car. Vinegar also deters frost so a spray of this mixture could help either prevent or de-frost your car quicker! And the best bit of all is that this is 100% organic and dirt cheap!

 Have you got any organic cleaning tips you'd like to share? Ann x

To get in touch and see the latest on all my adventures, follow me on BloglovinTwitter,Instagram or Facebook.


Thursday, June 26, 2014

Highlights of Spring 2014

Scotland Travel and Lifestyle  Blog

In what has now become a regular feature on A Quirky Lifestyle, this post contains are a few snapshots from the season just gone. I often feel a sense of lethargy at the thought of writing these posts but end up feeling both pleased and grateful when I'm done. Spring was full of new beginnings; settling in to a new city,  making a new 'home', starting a new jobs (both Ed and I had now changed jobs) whilst still recovering both individually and as a couple from the emotional trauma of the previous months. Our coping mechanism has always been to make sure we have happy plans that we can look forward to, now mostly consisting of exploring Edinburgh and Scotland.

Scotland Craft and Lifestyle  Blog

You can read all about our exploration of the Highlands in a five part series starting here. Travelling to the very edge of the country, taking in the most spectacular countryside and meeting the friendly people that lived around there was all good for the soul. My personal favourite was sunset at  Lossiemouth beach; it was without doubt one of the most stunning sunsets I have ever seen. A camera can never quite capture what the eye can see or what one feels in the midst of such beauty. Nearer home, Linlinthgow, Gullane and North Berwick were equally wonderful, each in its own special way. And as for Edinburgh, we are absolutely loving living here!

Scotland `Travel, Fashion and Lifestyle  Blog
Craft and DIY has always been a key part of this blog and my Spring pursuits included lots of sewing, candle making and updating our new interiors. There is so much satisfaction in the making your very own pieces of 'art'.

I hope you've had a lovely Spring too and that Summer brings lots of warmth and happiness your way. Ann x

To get in touch and see the latest on all my adventures, follow me on BloglovinTwitter or Facebook.

Monday, June 2, 2014

DIY Summer (Tin Can) Candles

How to make your own candles

As regular readers will know, I've been making candles for about a year or so now.   The old formula still works but I was keen on experimenting a little. A few weeks ago, I noticed the guys at Panda and Sons (my favourite Edinburgh speakeasy) serving cocktails in tin cans and that got me thinking. I did not like the idea of drinking cocktails out of tins cans (and flirting with tetanus) but I did like the concept of using tin cans for something interesting......like homemade candles! All you do is soak off the labels and dry the tin can thoroughly before using it. Alongside these, I also used old Diptyque candle jars and jam jars to make multiple candles. The other twist to my original candle DIY was the use of multiple fragrance oils to recreate the smells of my favourite coffee and of vanilla cupcakes. 


Homemade candles tin can

To make these yourself, follow the instructions here but double the amount of fragrance oil. For the special coffee flavour, I used the following combination: 2 tbsp coffee scented oil, 1 tbsp vanilla oil and 1tbsp frankincense. For the vanilla cupcake flavour, I used 2 tbsp chocolate scented oil and 2 tbsp vanilla oil.

Homemade candles tin can

Other mods include making the candles in three stages rather than two. I filled the tin can and jars halfway and let it cool. I then used a chopstick to break the surface and release trapped air and topped to three quarters full. I repeated the procedure till the container was filled with wax. I found that the candles seem to last better when made this way.

Making your own candles like Diptyque

Will you give candle making a go this summer? Do let me know how you get on! Ann x

To get in touch and see the latest on all my adventures, follow me on BloglovinTwitter or Facebook

Thursday, May 8, 2014

Storage Box Update with Outspiration


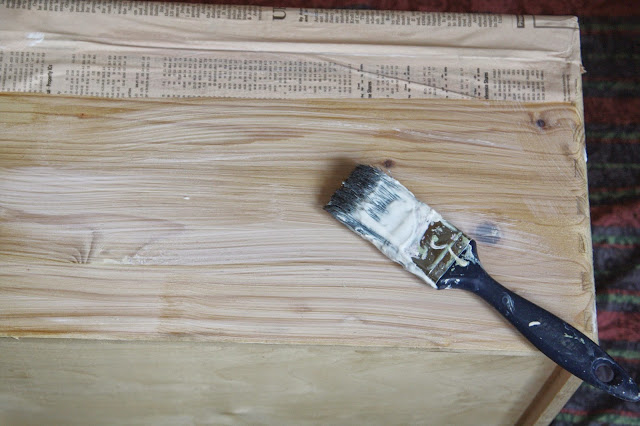
I’m an advocate for continuously updating/improving your home and garden in order to keep it looking fresh.  There are so many projects that Ed and I would like to get started on but time, resources and lack of motivation are often constraints.  This is where I think the new Outspiration app (that I was introduced to) will make a difference. It is an iPhone friendly app that inspires, guides and tracks your effort on DIY projects. Recently, I’ve noticed that we’ve been dumping a lot of stuff near our front door and I thought a storage box may be a good way to keep it tidy.  I looked up the Projects section of Outspiration for some ideas and inspiration (or should it be outspiration!?) eventually decided to improvise based on what I gleaned. I managed to buy a basic storage unit but it wasn’t in the least bit interesting. I don’t like dull and boring things so below are the steps I took to make it look stylish and interesting.


I used Outspiration’s Visualiser tool to look at options for painting the box. As I could not settle on a paint shade, I chose to use newspaper decoupage instead (I’ve been loving newspaper print interior products of late). It’s worth mentioning that Outpsiration also has a weather tool to help you plan your outdoor DIYs. This project was relatively straightforward and could be undertaken indoors (which was handy as the weather tool predicted a very grey day).


For this DIY you will need the following items:
A storage box
Sand paper
Old newspaper
Scissors
Modpodge or PVA glue
Clear varnish (or a plastic glitter spray)
Paint brush
Old fabric for lining the floor whilst sanding and painting
The Outspiration app for planning and tracking the DIY

Steps:
1.     Lightly sand the box down so that the glue or paint sticks well


2.     Cut pieces of newspaper to fit all sides of the box


3.     Brush a thin layer of glue onto one surface of the box


4.     Stick the newspaper and smooth out using the back of the paint brush
5.     Once dried, apply a layer of glue to the top of the surface to seal the newspaper. Use a couple of coats to seal each surface.


6.     Once all the surfaces are covered, apply a layer or clear varnish to weatherproof it (or use a plastic glitter spray for a bit of sparkle)
7.     If you decided to paint instead of decoupage, you can test what works best with your exterior using the Visualizer tool. After sanding, apply a primer and then a topcoat of your chosen colour and let it dry.


I’m loving my new storage box and I’m certainly getting Outspired to do more! To celebrate the launch of the app AkzoNobel is giving away a beautiful barbecue to get you outdoors and begin your Outspiration journey. To participate in a draw, all you need to do is download the app and enter your details in the WIN section of the app. The competition starts on the 28th of April and runs till the 12th of May. Have you been planning any DIYs of late? I definitely recommend checking out the Outspiration app to get you started. Ann x


To get in touch and see the latest on all my adventures, follow me on BloglovinTwitter,Instagram or Facebook.

Thursday, April 17, 2014

Spring Bucket List


The evening sun is streaming through our kitchen window and the warmth it carries is simply wonderful. I'd never appreciated seasons enough until I started living in the UK. Sunshine and warmth have never ever be taken for granted since. Spring in Scotland is still quite cold and the April showers are as far removed as one can imagine from warm monsoon rains I grew up with. And so a bucket list is still a good idea for this season to keep me ( and my readers) motivated to find new adventures. 

Go lambing: I love the sight of fat sheep and baby lambs and I'd love to visit a farm during lambing season just to watch them roll around in the grass. I have no idea where I can find a place near Edinburgh but I'm going to have a look.

Make homemade Nutella: Lately, I've been obsessed with Nutella. I think its beginning to show. I thought that perhaps a slightly healthier homemade alternative will give me the best of both worlds. I just need to find a suitable recipe... ideas most welcome!

Decorate our home with spring blooms: I miss our allotment and garden; the spring bulbs I planted year after year will all be in bloom now. I will compromise by heading to a local market ( I need to find one) or perhaps even Aldi ( their tulips are good value!) and bringing home a fresh bunch of spring flowers every week.

Discover local farmers markets: There is something lovely about fresh produce sourced directly from the growers. Since we no longer grow our own, I'd like to support those that do.

Make spring candles:  Lately, I'm inspired by the scent of roses, baking and chocolate. Its been a while since I've made my own candles and so I'm hoping to make some spring inspired ones soon.

Learn a new sport: I'm not particularly sporty but I do like trying new things. And one sport I've always wanted to play properly is tennis. Hopefully, I'll finally do it this year.


Explore a local beach: I know mentioned Portobello in an earlier post but apparently there are even more beaches nearby that are very lovely. I'd like a springtime picnic on the beach please!

Visit the zoo: I haven't been to a zoo in years! But not every zoo has Tian Tian and Yang Guan, the giant pandas who have been loaned to the UK. Without doubt there will be a blog post that follows that visit.

Travel a little: Scotland has so much to offer; ancient castles, magnificent lochs, quaint villages and outstanding natural beauty. I'd like to explore a bit more of all that this Spring.

And that's plenty to keep me bust I think. Do you fancy doing any of these things too? What does your Spring bucket list look like? Ann x

To get in touch and see the latest on all my adventures, follow me on BloglovinTwitter or Facebook.


Sunday, March 30, 2014

DIY Easy Cushion Cover


Hello folks! I hope you are all having a lovely weekend. Miracles do happen; I'm on my second blog post in two days! The reason for this is a combination of lack of time and procrastination. Not so long ago, I heard about the Hillary's Blinds Country Crafts Competition via the lovely ladies at The New Craft Society. Hillary's offered me a choice of  fabrics and I chose the Patina Pewter as it looked rich and versatile.  That said, I had *no* idea what I was going to make! I mulled over doing a patchwork jeans number but figured that was better done with floral fabric. Eventually, I decided to make two little cushion covers to replace a couple of very old charity shop sourced ones. I chose to make the covers pillowcase style ( i.e. almost envelope style but not quite)


For making the cover you will need the following

  • fabric
  • measuring tape
  • sewing machine ( or needle and thread)
  • scissors
  • fabric pins
  • tailor's chalk
  • iron


Method:

Step 1: Measure the cushion that needs cover. Cut two pieces of fabric such that you allow a 2.5 cm allowance on each side for seam allowance and 10 cm allowance on on piece of fabric for the envelope cover.

Step 2:  Place the right side of the two pieces of fabric together  with the 10 cm of longer piece folded in to create the envelope cover. Iron and pin the fabric for sewing.


Step 3:  Sew the three 'closed' sides of the cushion cover together. 

Step 4:  Finish the edges of the 'open' side


Step 5:  Iron the cushion and turn the right side out. And its all done and ready to be used!!


I hope you give this DIY  a go; it is so easy to inexpensively upgrade a cushion covers and it feels so good when you make it yourself. Hope you have a lovely week! Ann x

To get in touch and see the latest on all my adventures, follow me on BloglovinTwitter or Facebook.

Sunday, March 23, 2014

DIY Wrapping Paper Art


I'm conscious that ever since the big move to Edinburgh a few weeks ago, I've had a very little time for most things, blogging included. It's been a time of massive change and we've had to downsize and sell most of our 'stuff' before moving up. On the positive, that felt quite liberating. Moving from a suburban house into a 100 something years old tenement flat in the centre of Edinburgh meant our style of decor needed a review too. The hallway in the flat has this quaint pew style sitting area and despite playing with a lot of our art and pictures, nothing seemed to work quite right there. I'd already bought these two beautiful sheets of  London print wrapping paper from Watermark (London Kings Cross) and was planning to create something arty with them: decoupage or framing were the two options I was exploring.  Framing these papers with an aged look felt like the perfect solution.  A trip to Ikea and £14 later, we got two super light frames and this was the result!


Items:
London print wrapping paper ( £2.99-£3.50 each from Watermark Kings Cross, Oliver Bonas or Stanfords.co.uk)
Frames (Ikea, £7 each)

Method:
Simply frame and find a suitable place! You could also try framing patterned wrapping paper ( paper chase stock some great ones too) and source frames from charity shops.

This is a really easy and affordable way to update your interiors and I hope you give it a go! Ann x

To get in touch and see the latest on all my adventures, follow me on BloglovinTwitter or Facebook

Tuesday, February 11, 2014

February Etsy Favourites


Hello my lovely readers! I hope your February is going well. Life in our world is rather manic with a few more days left before we move the last of our belongings to Edinburgh. It has taken us a while as we have been phasing our move but we agreed that it is better to plan and be methodical rather than rushed and chaotic. As a result, I have very little blogging time (or any other time) these days. In between house viewings, eBay marathon and postal runs, I've taken some time out to help you choose a few treats for February. Whether you want to welcome the year of the horse with a cute Chinese inspired purchase, or if you simply want to buy a unique quirky treat for someone you love, I'm hoping I've got it all covered for you.


Valentine's Party Accessories: Whether you are making homemade popcorn ( or cheating) or if you want a quirky bag topper for a Valentine's pressie, this Etsy shop has some fun fun accessories that you will make you ( and the receiver) smile.

Bespoke Affordable Jewellery: If you want to impress your lady love, bespoke jewellery is the way to go. And you don't have to break the bank with the beautiful and affordable choices available at this Etsy store

Fun Valentines Day Cards:  The shops are full of V day cards but for something truly unique, there is no better solution than to make it yourself. If you aren't into card marking, these Etsy folks will leave you spoilt for choice!

Chinese New Year:  I may be a bit late for this but then again, Chinese New Year celebrations do tend to go on for a bit. If you fancy a late celebratory treat, I really like this affordable art piece!
  
Vintage Inspired Sweets: I love my Laduree and Pierre Herme but this sweet shop has some truly unique sweet treats that will impress any vintage lover.

Lace Collars: If you are thinking, sod this V day business, I love myself and that is enough, more power to you! Perhaps some self-gifting may be the way to go? These gorgeous handmade lace collars will spruce up any plain outfit.

Handmade Wreaths:Spring will soon be here and if the grey days are bearing you down, some early Spring colours should bring you cheer. These handmade wreaths are stylish, affordable and will add a touch of hope to dull February days.

Afforable Luxe Home Accessories:  And if you all you want is to curl up indoors on your sofa , these affordable yet luxe lettered accessories will add an extra touch of cosiness to your pad.

What are you going to buy this February? Ann x

To get in touch and see the latest on all my adventures, follow me on BloglovinTwitter or Facebook.

Thursday, February 6, 2014

How to knit a chunky two toned scarf


In keeping with my winter bucket list, I've been trying to make homemade presents whenever I can. So for my mother-in-law's birthday, I decided to make her a chunky handmade rowan scarf. I found knitting with chunky rowan slightly harder ( as compared to a synthetic mix) due to the fibrous nature of the wool. However, after a few rounds, I seemed to get the hang of it. This scarf is really easy to make and only uses the basic knit stitch. Its beauty solely lies in the quality and colours of the rowan wool. Here is what I did...


You will need:
  • 3 balls of rowan drift merino wool in two colours, 100g per ball
  • size 10 knitting needles
  • an endless amount of patience
Method:
Cast on 28,  and knit 28 per row until you finish the balls of wool (approximately 125 rows in total). To join a new colour, make sure you start at the top of the row for uniformity. Cast off and sew in loose ends.

And that is it! This is a great project for a first time knitter and will help you build confidence. I somehow seem to be stuck on scarves and am currently working on two more woolly presents! Hope you are having a lovely week and if you aren't, its Friday tomorrow!! Ann x  


To get in touch and see the latest on all my adventures, follow me on BloglovinTwitter or Facebook.

Tuesday, January 28, 2014

Hat Making Masterclass with Katherine Elizabeth


On Christmas day, I happened to see a little thing on the Time Out London website that got me instantly excited; a millinery masterclass! I did a bit of research on the milliner Katherine Elizabeth's work and was rather impressed by her fabulous Ascot creations. A video of Katherine magically creating an exquisite headpiece in no time at all had me assuming that this would be a rather effortless thing to do. And with £200-£800 and upwards for fancy hat, I thought I may be persuaded  to have a bit of career change myself! Needless to say, I was very much looking forward to the January session. My only worry was that the masterclass poster seemed incredibly cool and rather fancy too. Will I seem like a bit of an odd geek in the midst of a herd of Louboutin clackers, I nervously wondered?


My fear of not being cool or fancy enough was entirely unfounded. Our group of ladies were a very jolly and friendly bunch. And Katherine was very down-to-earth and loveliness personified. The masterclass started out with Katherine giving us a bit of history on the subject and describing a few basic techniques. We also learnt the virtues of sinamay, the millinery wonderweb sourced from the Phillipines. As part of our masterclass, we were to create a fascinator and a 1940's style sculptural felt hat.  All the materials were provided and there was plenty of tea, coffee, cake and even prosecco (shame I wasn't drinking) to keep us going. 


I learnt very quickly that becoming a rich milliner overnight wasn't going to happen. Moulding sinamay was hard work. In fact, none of this hat making malarkey was particularly easy. And there was plenty of sewing and self-jabbing too. Katherine, with her years of experience, made it all seem so effortless that I foolishly underestimated this whole millinery business. I eventually created a little pillbox hat which had a bit of gingham, leather and netting thing going. Even the felt hat making was quite challenging, partly because I wasn't entirely sure what I wanted as an end result. I eventually created something that looked like it could be part of the Star Wars costume kit (and it will no doubt feature on the blog one day).


But don't me put off by my lack of millinery skills, my fellow wannabe milliners did a pretty fabulous job. They also made excellent models! And Katherine and her lovely assistant were incredibly helpful. When I gave up on sewing through several layers of felt, Katherine stepped in to rescue the 'thing' that I was creating. Similarly, when my hands were getting sore from twisting sinamay, Katherine's assistant (Lucy) did a fab job of rescuing it. All of us did go home with two, atleast almost finished, hats!

If you are a hat person or need one for a wedding or event, I'd thoroughly recommend attending one of Katherine's sessions. Full details are available on her website http://www.katherineelizabethhats.com/home. Also worth checking out the Milinery Events website if you fancy booking a private or corporate event with Katherine.

Hope you are all having a lovely week!Ann x

To get in touch and see the latest on all my adventures, follow me on BloglovinTwitter or Facebook.


Thursday, January 16, 2014

January Etsy Favourites!


January is often a time for new starts and I have one little new feature for the blog. I recently became an Etsy affiliate which is quite exciting! It sits well with my ethos of promoting local designers, handmade and vintage. With that I've decided to regularly share a selection of handpicked favourites every month that I hope will interest my readers.  This month I've been mainly decluttering and organising for our big move to Edinburgh. I've also been dreaming to bright colours, sparkly jewels and quirky touches for our new home. Unsurprisingly, Etsy has some gorgeous offerings.

Quirky cushions:  If Lulu Guinness feels a bit out of reach but lip smacking curious still get you excited, this beautiful cushion (a steal for £18!)  may be just what you are after.

Hand carved bookshelves: I love my books and am always on the lookout for unique bookshelves. Benjanim's Barn has some truly beautiful pieces that look like they will last a lifetime and still remain  stylish.

Eco friendly storage: As part of our move, we are decluttering, downsizing and organising our lives. It is very liberating. That said, these eco friendly storage units look like a very useful for keeping life organised whilst enabling mobility. And, they are so very cool too!

Funky art: Just because we are moving/decluttering doesn't mean we are going all bland. I love having art and colour around our house and this little framed piece is on my wish list for a our new home!

Ceramic plant pots: I am going to miss our garden and allotment but it doesn't mean I'll stop gardening altogether. There are plenty of options for playing green-thumbs indoors and these ceramic pots make a rather stylish affair.

Dressing up: This whole business of moving many hundred miles is a rather stressful affair to say the last. I figured little indulgences like these Jennifer Loiselle earrings or this bright vintage peter pan collar dress would make life a lot happier!

What do you make of my Etsy list? Which are your favourites? Ann x

To get in touch and see the latest on all my adventures, follow me on BloglovinTwitter or Facebook.