Saturday, April 27, 2013

Dressing Table Makeover on a Budget


Have you ever felt frustrated by a corner of your home? Of late, I've been feeling rather uninspired by my dressing area. It was cluttered, utilitarian and not exactly pretty. When I finally found  makeover inspiration through Pinterest and the Lucky Mag, I wanted to act swiftly. The Easter Bank Holiday weekend combined with depressing weather meant we had no desire to work in the allotment and enough time to do stuff around the house. I had a vision of what I wanted my dressing area to look like and wanted to make it a reality. I also wanted to do it at very little cost. I scoured the Internet including eBay and Etsy and stores like Dunelm Mill but did not find what I was looking for (or at least not at the right price). That mirrored vanity tray I so dearly wanted continued to elude me and the high street simply did not inspire.


Dressing Table: Before

I dragged Ed around a number of charity shops but saw nothing that was quite perfect for what I was after. Ed eventually suggested visiting the Sue Ryder Superstore in Thorney. That was an inspired suggestion. I found everything I was looking for ( almost) and at a great bargain. I found a vintage mirror for a £1, a cut glass tray that I chose to use as a vanity tray for £3, a lovely little lampshade for £2 etc. The entire haul seen in the photo below cost just £20! Do you see why I love charity shops so much?


Charity Shop Haul


Here are the steps I went through to reinvent my dressing table
  • De-clutter: I bagged all the jewellery and bits and bobs I had not used in the last six months into a bag for a charity drop. I also saved some bits for a spring car boot.
  • Clean canvas: I cleared the entire space as it used to be and started thinking through the ideal layout for the area. I had an end result in mind which was dreamy and beautiful. I used that vision to develop the space.
  • Showcase jewellery: Ed helped me with a bit of drilling and nails ( he is tall and that helps!) to hang some of my favourite necklaces. I used an old gold frame to showcase some of my favourite earrings. DIY post to follow.
 
Mirror and glass for a touch of class

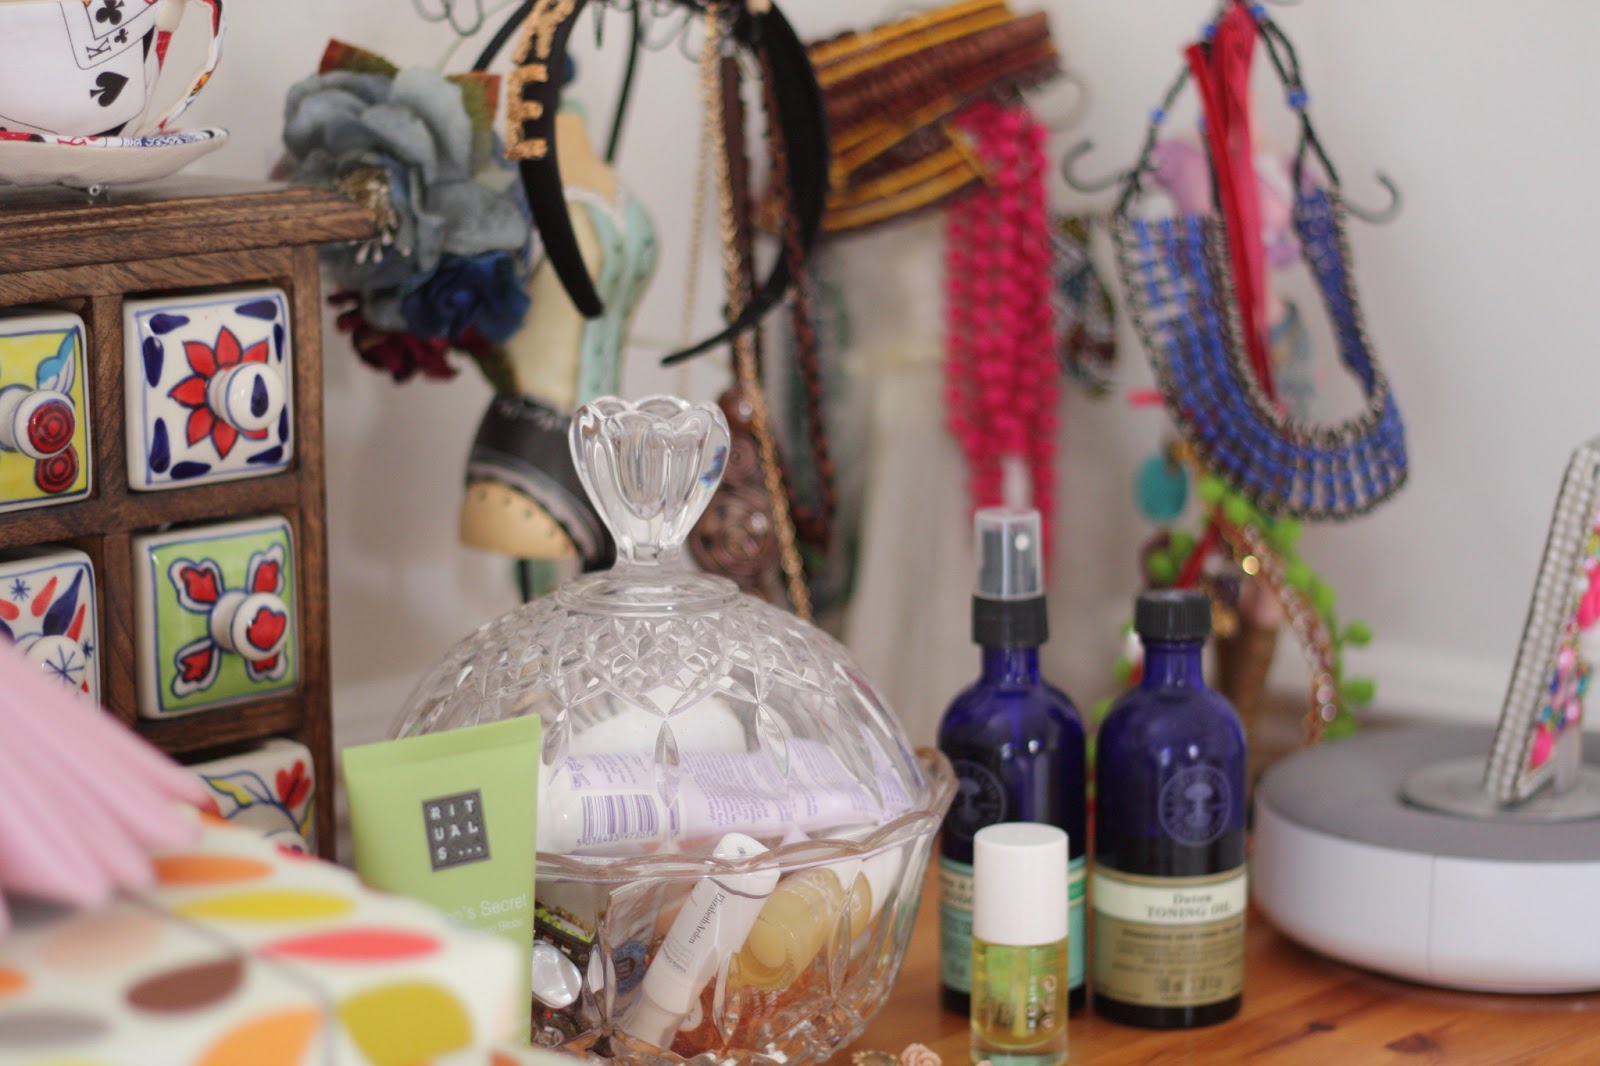
  • Glass is good: I used the vintage glass tray as my vanity tray to hold perfumes, lotions and candles. Glass jars formed sparkly hiding places for more more utilitarian items. I used a vintage sundae glass to hold some sparkly bits of jewellery
  • Finishing touches: I held onto a my little jewellery cabinet from TK Maxx as it was pretty and blended in nicely with the overall look of the area. The recycled table lamp and some flowers helped finish the look. I'm still on the lookout for some flocked wallpaper to decoupage the top of the table for a bit of extra glamour.
 
Perfume collection and a bit of Diptyque

Whilst it took me a while to find the various bits for my dressing table project, the organising the space only took a few hours. The end result was immensely satisfying and achieved on a shoestring budget. This project has also inspired me to start tackling other little corners of the house that need a bit of TLC.

Do you like my little DIY makeover project? Have you been up to any budget makeover projects yourself? Ann x

Dressing Table: After


To get in touch and see the latest on all my adventures, follow me on Bloglovin, Twitter or Facebook 

Friday, April 26, 2013

DIY Mouse Flats Inspired by Marc Jacobs


Readers of my ex-blog Made by Ann may remember me lusting after a pair of Marc Jacobs mouse flats whilst strolling through the Parisian district of St. Germain. I'd decided then that I would do a DIY project inspired by those lovely flats. I managed to buy of pair of red flats for less than £2 whilst shopping in Mumbai's Linking Road street market and they seemed a good enough choice for my project. Here is how I went about it.

You will need:
  • 1 pair of flats, bright colours work best ( try H&M and Primark sales or charity shops for cheap as chips shoes)
  • Felt in two shades of brown. I used leftover bits from my Advent Calendar project.
  • Craft Glue
  • Glitter Glue
  • Cotton bud
  • Ribbon for whiskers
  • Scissors
  • Pencil
  • Tracing paper


Method:

Trace out the ears, eyes and nose of the mouse on tracing paper and use this to cut out the felt. Cut thin strips of ribbon to act as whiskers. Glue these on the shoe and let it dry. Once dried, add some glitter glue to the eyes, ears and nose to make the shoes sparkle. You can customise your shoe according to how you like it. Perhaps use beads for the eyes instead? Or fine wire for the whiskers?

Let me know what you make of these. My husband thinks they look like 'my first shoes'. My friends are not convinced I should wear these to work. Would you? ;) Ann x


Sunday, April 21, 2013

Shortlisted for the Company Style Blogger Awards 2013: Best Thrifty Blog and Best Crafting Blog!!


A big thank you to all those who nominated me for the Company Style Blogger Awards!! I was not expecting to go far but I’ve actually been shortlisted in two categories! I’m bouncing with joy right now just to make the cut. The next step is an intense round of voting followed by the final awards-I think! I’m still waiting for some details from the magazine.

I really need your help and votes to make it and win. The voting is quick and should not take more than five minutes. You don’t need to register and you can opt out of emails. You can only vote once. Here is a quick step by step how-to on the voting.


1. Click on http://www.company.co.uk/magazine-hq/stylebloggerawards2013. You will see this page.


 2. Click on the VOTE FOR YOUR FAVE 2013 BLOGS HERE! link

3. Click next till you get to the Best Crafting Blog and select www.quirkylifestyle.com. Carry on clicking next till you get to the Best Thrifty Blog category and select www.quirkylifestyle.com. Here is a snapshot of the two pages with my blog.

4. Continue to click next till you get to the last page where you can choose to add your email address, choose to opt in or out of emails and then just click SUBMIT!

Thank you so much for your support. I’d love it if you could spread the word. Ann x


Hambleton Hall and the Art of Fine Dining

 
In an era where casual dining and lack of formality (whatsoever) seems commonplace, visiting Hambleton Hall felt like time-travel.  I've been reading a few lifestyle blogs and books of late that bemoan the lost art of civilised dining. How often do you have your table perfectly laid, well presented and all your best crockery and cutlery out? Chances are, probably when you entertain? I must confess I've done my fair share of slobbery and we still sometimes choose to sit and eat in front of the television too. I have feeling that after our little visit to Hambleton Hall, all that is about to change.


I have to thank my friend Rosie for a) pointing out the lunch for less offer b) convincing Ed to actually go ( can you believe it!). Previously, thanks to various posh tales, I'd always envisaged the Hambleton Hall to be somewhere I'd fancy going for a glass of sparkling water due to its limited affordability. However, the lunch for less offer meant you got to actually have a proper two course meal for just £24 ( plus service tax)!! Assuming it was a winter offer, I quickly booked us in for Saturday lunch. I had to book about a month in advance. I now understand that the offer runs all year and gets slightly cheaper in winter. 


On arrival, we were ushered into the drawing room where we ordered our pre-meal drinks and engaged in seemingly civilised talk (I was actually quietly telling off Ed for not dressing up enough). I'm usually over-dressed to most places but here, I just about fitted in. I will do a separate outfit post shortly. There were a couple of elderly couples and a small group of younger couples/friends sat around us in the drawing room. Everyone was dressed like they were going to a very fancy wedding. The couple that sat across from us were particularly cute as the gentleman treated his partner with such quaint and old-fashioned chivalry. We stayed in the drawing room for a while, consuming complimentary amsue bouche, sipping cocktails  and pondering over menu choices. Eventually, we were escorted in to the dining area.


We chose from the set menu and opted out of starters. I ordered trout for my main course and Ed had lamb. Whilst the menu was unassuming, the food itself was pretty spectacular. The combination of exquisite flavours and textures plus the stunning presentation made our meal a phenomenal experience. Ed and I like fine dining and have been to plenty of fancy restaurants but this place was rather special. Just when we were thinking it couldn't get better, our desserts arrived. My apple crumble souffle with a dessicated slice of apple was otherworldly. Ed's cheesecake was simply spectacular looking and tasty too. Also, in between courses, the young waiter attending to us combed our table with a silver crumber. Clearly, attention to detail is all important at Hambleton Hall.
 

To finish off our fabulous meal, we ordered a cafetiere of freshly ground coffee. The coffee aromatic and delicious and accompanied by a tray of dainty macarons, jellies and chocolate. I was particularly taken by the mango jelly topped with popping candy. Mentally, I  started re-creating a grape version of the jelly with our allotment bounty from last summer. Ed and I went for a little stroll around Hambleton Hall before heading back home. I will do another outfit post including some of Ed's lovely photos of the gardens shortly. I can't wait to go back to Hambleton Hall again, hopefully in the summer.


Have you had a fabulous meal recently? Or have you been inspired by an exquisite recipe or image you've seen somewhere? I'd love to hear. Ann x

To get in touch and see the latest on all my adventures, follow me on Bloglovin, Twitter or Facebook .
Hambleton Hall Menu, Reviews, Photos, Location and Info - Zomato

Saturday, April 20, 2013

Mixing it up a little


I subscribe to a style that is both whimsical and eclectic; be it in the form of  giant candy shaped bags or hot pink skirts that have made friends with a bit too much plastic. I believe that the clothes you wear, and more importantly, the way you wear them play a big role in your sense of cheerfulness.
The English weather has been rather hit and miss of late and I needed to inject a big dose of cheer into my day. So for our little Saturday morning trip into town to see friends, I chose to mix it up a bit. I paired a nice classic cashmere with a playful skirt from Monki , a pair of converse trainers with a lovely silk scarf, and topped it all of it with sweet shaped bag! I looked at the mirror and smiled :) My husband insisted that I looked completely bonkers but that didn't really put me off. Here is a little secret; I like dressing bonkers just to make people laugh. After all, life's too short to dress like you are in mourning!


In case you were wondering why I'm stood in front of an Indianesque sculpture, this photo was taken at The Banyan Tree, a local Indian restaurant. We rarely visit Indian restaurants as we cook Indian food at home and the westernised offerings we get at restaurants rarely measures up.The food at The Banyan Tree was nice enough but I particularly liked their choice of beverages which included mint tea. Personally, I think its more Moroccan than Indian but it works well in cooling your tummy after a hot curry.


What do you make of my outfit? Would wear Converse with silk and cashmere ( and giant candy bags) ? Have you been up to any quirky styling of late? Ann x

Wearing: Lands's End Cashmere Jumper, Moschino silk scarf, Monki Tamary Skirt, vintage Converse, Margiela Candy Clutch

To get in touch and see the latest on all my adventures, follow me on Bloglovin, Twitter or Facebook .
 

Wednesday, April 17, 2013

Defying Gravity


Do you remember my things to do before my blog turns one list? I'm pleased to report that I've been ticking some of these off! On my list was a quirky partying item which was fulfilled thanks to a chance find on Living Social and the subsequent revelry at the Down Hall Hotel. Unfortunately, the predictable unpredictability of the weather here meant it rained non-stop all weekend. Gone were our plans of wandering the gardens of the country house hotel, playing garden chess and taking outfit shots against the spectacular backdrop of the hotel. Some gentle persuading ( and a few strops) later, the husband agreed to do some low light outfit shots in our fabulous room. Here, I've styled another quirky and ethical look thanks to a few reliable e-commerce friends and one of my favourite shops in forever.


My outfit was styled around my favourite gravity-defying Eamz boots, a real bargain via Cocosa. It is a bit of challenge to style big-statement wardrobe items, as you are probably aware. I've usually worked these walkers with a very plain dress but I decided to get a bit braver this time. In fact, I've teamed it with another statement piece, my O.M.O choli top, worn over a plain cashmere jumper. My skirt is an old yet versatile corduroy number from the Joules sale. And, there is of course my bag BFF, the Mulberry Alexa. The Eamz boots are extremely comfortable and very sturdy. My choli top was handmade by women artisans ( working for O.M.O) from recycled fabrics. O.M.O is one of my favourite shops and I will be writing about it sometime soon.

A few details

Also, I haven't yet got round to writing a post about my experience at London fashion Week. FYI, the choli top combo I'm wearing here is what I worn on Day 1 of LFW with a pair of skinny black jeans. I'd love to hear about how you style your statement pieces too? And, what do you make of my gravity defying boots? Ann x

To get in touch and see the latest on all my adventures, follow me on Bloglovin, Twitter or Facebook .


Sunday, April 14, 2013

Tips for Allotment Planning and Crop Rotation


It's been a while since I've done a gardening or allotment post. I blame the weather. Last year was a terrible year for us on the allotment. It began with the worst drought on record a long time followed by months of non-stop flooding. As a result, half of our plot was unusable. The other half was overtaken by weeds and wetness making the whole business rather unmanageable. Many of our neighbours gave up their plots. We decided to persevere for another year. The freezing weather and very late spring meant allotment planning and sowing suffered too. Nevertheless, we finally managed to get on our plot last week for a round of digging, sowing and planting. I've also managed to spend some time planning crop rotation and planting.


Crop rotation is an essential part of planning your vegetable garden. It's all about chemistry. So here are some top tips on how to go about planning your allotment. You can compare our plot last year versus this to make a quick assessment yourself. I must add, it isn't perfect but useful enough.
  • Sow brassicas ( cabbage, cauliflowers, broccoli)  after legumes (beans and peas). They will benefit from the nitrogen fixed in the soil by the legumes
  • Plant legumes after  the potato family. The potato family includes tomatoes and peppers. 
  • Root vegetables are a good follow on act to brassicas. Potatoes also do well after brassicas and that is what we've gone for this year.

Whilst planning your allotment, it is useful to consider companion planting. Some of my favourites are these:
  • Tomatoes, basil and french marigolds. The smell of tomatoes and basil together is divine. The marigolds keep nematodes at bay
  •  Nasturtiums and most things! I plant my nasturtiums in between my legumes, root vegetables and brassicas. They help by attracting hoverflies which deter aphids.
  • Onions planted amongst carrots can help with deterring carrot fly.
I'd love to hear your gardening tips too. What have you been growing lately? Ann x

To get in touch and see the latest on all my adventures, follow me on Bloglovin, Twitter or Facebook .

Saturday, April 13, 2013

Recycle The Chic: Ethical French Style


You know I love Charity shops and why. Today, I'll give you one more reason why you should too. When I wrote about the Octavia Foundation shop in London a few months ago, I mentioned the fact that they had a number of stores around London. A recent trip to their Fulham road store was so much fun and I ended up buying this exquisite silk cardigan by Joseph. The style is very French,  feminine and versatile. 


Here, I've teamed the cardigan with a faux leather panelled skirt from the La Redoute sale, a silk cami from a local charity shop and a pair of pre-loved Manolo Blahnik kitten heel shoes. My Mulberry Alexa satchel and a Dannijo lobster necklace help complete my French inspired ethical-chic look. The faux leather skirt gives the outfit a young and modern edge.


Isn't it amazing how many fabulous things you can buy second-hand whilst helping the environment and contributing to charity at the same time? What do you make of this outfit? Have you bought anything cool from charity shops or pre-loved lately? Ann x


To get in touch and see the latest on all my adventures, follow me on Bloglovin, Twitter or Facebook .

Friday, April 12, 2013

DIY Dainty Neon Crytal Necklace


Like most of you, my tastes have changed over the years. That means I once bought a lot of 'tat'. I try to do less of that now. Whilst sorting out my jewellery boxes, I found this little crystal necklace which is pretty enough but isn't quite me. I've been wanting to do a nail polish crystal necklace project for a while now and I thought this necklace was perfect for it. Here is how I did it:


You will need:
A crystal rhinestone necklace ( you can find really cheap ones for about £1 in charity shops or in the high street sales)
Nail polish of your choice
Cotton buds for tidying up the nail polish
Old newspaper to use as a base
   

Firstly, decide what style you want to go for. Design houses like Anton Heunis, Dannijo,Tom Binns etc can provide plenty of inspiration. High street stores like Zara and H&M are pretty good too. In my case, I chose to bring out the best in the necklace's inherent style. I chose yellow and green pastel/neon shades to bring out the flower and leaf patterns in the necklace. I chose to not colour all the crystals as I like a little sparkle. And that was it! It took about 10 minutes to dry properly and I was ready to play princess :). I love the quick and unexpected transformation of this necklace. What about you? Ann x


To get in touch and see the latest on all my adventures, follow me on Bloglovin, Twitter or Facebook .

Saturday, April 6, 2013

Lets Get Macaronning!


Do you remember my first attempt at macarons catalogued through my ex-blog Made by Ann ? They were far from perfect and had cracked surfaces but still tasted lovely. I learnt a few things from that experience including the importance of getting the temperature spot on. More recently, I attended a Bloggers Buzz event where Dora from BoBo Macarons gave us a demo on macaron making. Dora taught us three things essential to making perfect macarons 1) egg whites aged for a few days 2) time in the oven and temperature 3) the importance of being in a good mood. Watching Dora's technique taught me more than any recipe book and I was looking forward to giving macaron making a go again.


Here is the recipe I used. I must add that this is slightly different to the one Dora used, partly because I wasn't sure my notes were quite right.

For the macarons:
150g almond powder
210g icing sugar
90g caster sugar
3 large egg whites
Gel food colouring . I used hot pink, sky blue and lime green

For the butter cream icing:
150g unsalted butter
75g icing sugar
1 tsp vanilla extract
 

Method:

Heat the oven to 150C. I use a fan heated oven. If you use gas, you may need to reduce the temperature a little bit. Recipes recommend around150-160 for fan oven and 140-150 for gas ovens. You need to test a batch and figure out what works best for you.

Sieve the almond powder and icing sugar together and mix well. In a separate bowl, whisk the egg whites and slowly add the caster sugar until the mixture is thick and shiny. (It is recommended that you add food colour to the egg white meringue mixture. However, I chose to do it later after all the ingredients were mixed together) Mix the almond and meringue mixture well until it smooth, glossy and flows smoothly off the spatula.

I then separated the mixture into three parts and added a few drops of gel food colour. I was aiming for a pastel shade. The colour of the mixture and the end product were near enough similar,  point worth noting as I assumed it would darken significantly.

Pipe out the macarons onto a parchment paper on a baking tray and rest them for about 15 minutes until they have firm skins. Bake for about 15 minutes or until the macarons look ready. Leave them to cool for about 30 minutes.

For the butter-cream icing, whisk the butter and icing sugar together until thick and creamy. Add flavouring of your choice whilst whisking. I used vanilla extract.

Once the macarons have cooled, sandwich them together with butter cream icing and they are ready to serve.

Lessons:
1. Cooking or baking on your own isn't that much fun. My husband was a willing Sous Chef who helped with sieving, piping etc. It often felt like some of the tasks were more efficient if two people did it rather than one. So find a friend or partner to make your macaronning experience more fun. ( Ed may not think it was that much fun to be fair as I was a stress-pot)
2. Don't rest the mixture too long before piping. The second batch I piped out were a disaster. Then again, the third weren't too bad which is puzzling!
3. Don't over bake as the macarons start browning. A lesson I learnt with my third batch. Keep an eye on he clock and the progress on the macaron.

Let me know how you get  on with macaronning. Ann x

To get in touch and see the latest on all my adventures, follow me on Bloglovin, Twitter or Facebook .

Friday, April 5, 2013

London Fashion Week AW13: Ashish


Many of you know that I'm a civil engineer by background and have spent a good part of my working life on construction sites. Some years ago, I was based full-time on a couple of construction sites wearing oversized hi-vis jackets, hard hats and steel toe boots. My only means of counteracting that scruffiness was to put on lots of lippy, all through the day. That period had a lot of influence over my conversion into a fashionista. I needed creative balance in my life after a long day of being surrounded by diggers and construction folk.


I never once equated hi vest jackets and PPE with fashion. You can imagine my surprise when I received my invite to the Ashish show at London Fashion Week which had a construction site as its cover photo. I was suitably intrigued. Ashish stuck to the promise in his teaser invite. The  show began with the models sauntering in wearing glittery hi-vis jackets. I felt a DIY PPE session coming on.... Whilst the entry seemed a bit too predictable, the follow-up act was good. The show focused on construction site inspired chic  with boiler suits, keffiyeh inspired dresses and plenty of hi-vis action. It was fascinating, to say the least. I'd be interested in seeing how many celebs/people actually end up wearing some of this collection. I quite like the dresses...


What do you make of the collection? Would you wear a hi-vis jacket with glittery heels? Could this be the future of fashion? ;) Ann x

All photo via Vogue Online

Monday, April 1, 2013

DIY Scarf Watch


 You probably know that I am a sale stalker. A Moschino scarf watch recently caught my eye. It was 50% off  in the sale at £60. Rather than succumbing to yet another purchase, I figured I could find a way of making my own version and hopefully one the was more versatile as a result. Here is how I went about it.

You will need
  •  A scarf, preferably smallish and not too delicate. I chose a £1 vintage scarf from our local Sue Ryder shop
  • A watch, preferably one that has a strap that is easy to un-hinge. I chose this lovely Mango watch that I bought a few years ago.
  • A pair of pliers
  • Some measure of patience.


Method:

Un-hinge the watch strap using jewellery making pliers. Roll the scarf and thread it through the watch loops. This was harder than I thought as some of my scarves were either too big or the material was not fine enough to loop through the watch. Even my vintage square scarf needed a fair enough of pulling to get it through the watch. This also depends on the spacing within your watch loops. 

Once you've looped through the scarf, tie the scarf around your wrist and bingo! Hopefully the pictures below are self-explanatory. So easy and it saved me £60 :)

I'd love to know if you gave this project a go too. Ann x


To get in touch and see the latest on all my adventures, follow me on Bloglovin, Twitter or Facebook